
The power of the public cloud is quite enticing. Once you've experienced the thrill of clicking a button and watching a machine magically spin up - ready for personal use in mere seconds or minutes - is quite intoxicating. But when you dive into deploying real-world environments on a public cloud platform, things get more challenging. Manually configuring multiple instances, networks, security groups, etc. directly from a cloud provider's portal is tedious, time-consuming, and error-prone. Alternatively, many cloud platforms like Azure, employ template languages to allow deploying complex cloud environments automatically through human-readable "infrastructure-as-code" template files. Azure's template files are called ARM Templates (Azure Resource Manager Templates). Though they allow deploying complex cloud environments, template files are not very easy to use, and have some other challenges which I'll cover in a separate blog.
So how do we get the best of both worlds?
In this how-to blog, I'll provide a basic overview of how CloudShell's native integration with Azure makes it easy to model and deploy complex application environments on Azure. This how-to assumes CloudShell is already installed on your Azure cloud, local data center, or local machine.
Step 1 - Connect CloudShell to Your Azure Account
If CloudShell is not installed in Azure, you need to deploy a few CloudShell specific resources in your Azure cloud in a new resource group. The first is a CloudShell automation server so that CloudShell can drive orchestration directly from your Azure cloud (rather than via SSH over the internet) and the second is the QualiX server to allow secure SSH, RDP and other console access to your resources w/o requiring a VPN. We've made this pretty easy by providing a single ARM template that will deploy the resources and configure the networking for you. Follow the directions here. You'll just need to note the name of the CloudShell resource group you deployed the CloudShell ARM template in.
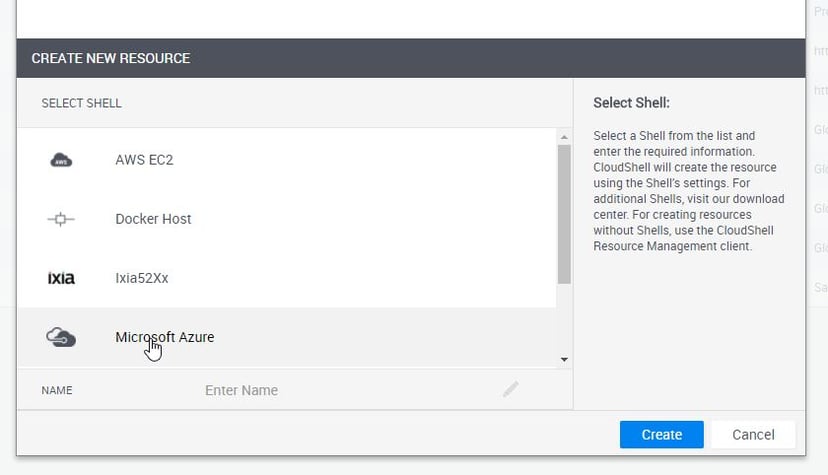
Once this is done, your next step is to create a new Cloud Provider Resource in CloudShell that points to your Amazon cloud account. In CloudShell just go to your inventory and click "Add New". From there select the "Microsoft Azure" resource. Give your Azure cloud provider a name that uniquely identifies this Azure deployment. For example, something like this might make sense: "QA Team - Azure - US West".
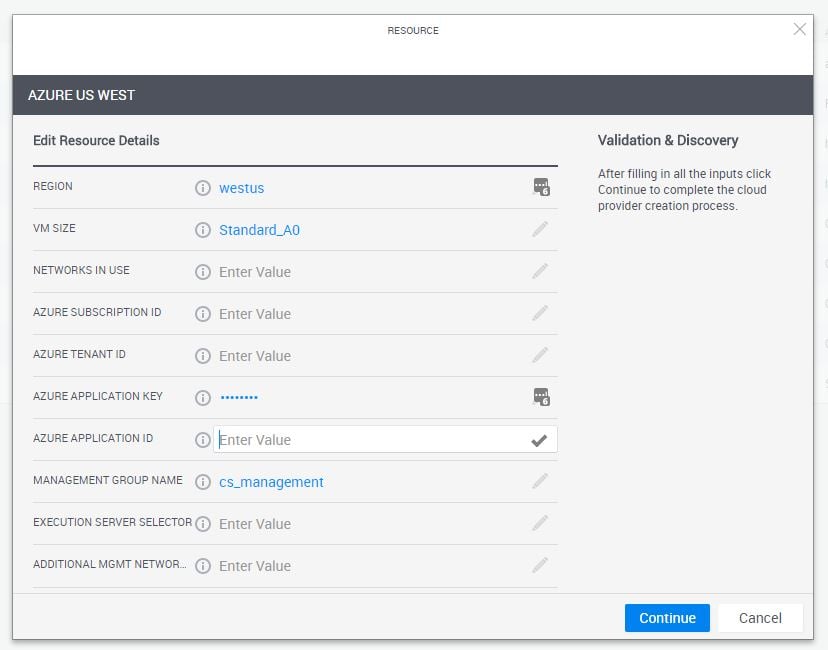
From here, you'll need to provide some specific information about your Azure account including your Azure Subscription ID, Tenant ID, Client ID, Secret key, and the name of the resource group you created in the above step. Detailed instructions are here. Once you've done this, CloudShell will connect to your Azure account and add your new Azure cloud to the list of clouds that you can deploy to when building application blueprints.
Step 2 - Setup Your Apps
CloudShell allows you to build a catalog of apps, which are templates that define the infrastructure, deployment mechanism, and configuration mechanism for a deployed app. Watch this Chalk Talk session to learn more about CloudShell's app and Shells architecture.
So, you'll want to set up new or existing apps to deploy to your newly added Azure cloud. To do this select (or create a new) app, and click on Deployment Paths. From there select "New Deployment Path". Here you'll need to specify if this Azure app will be pulled from the Azure Marketplace or from a custom image. Once you've selected that, you'll then select what Azure cloud this deployment will target; select the Azure cloud instance you just created above. You'll have to provide additional app-specific information depending on whether you select a Marketplace or Custom Image.
This is one of the aspects of CloudShell's "app first" approach that is so powerful - each app can have multiple cloud deployment targets making it very easy to change an app's deployment from, say an on-prem vCenter deployment, to a public cloud Azure deployment.

Step 3 - Build Blueprints and Deploy to Azure
Now we're set up to model a complex cloud environment without having to mess around with ARM templates!
Create a new Blueprint and simply drag in all the applications you want to deploy. For each app you add to the blueprint, you'll be prompted to select what cloud the resource should deploy to; select the Azure cloud you added. Each blueprint is managed as a whole. When you deploy a blueprint, the blueprint orchestration code manages the deployment of each Azure resource in that blueprint - deploying each resource to the specified cloud. CloudShell creates a separate Azure resource group for each deployed blueprint, as well as a separate, isolated, Azure VNET that all the resources will be deployed in.
CloudShell supports hybrid-cloud deployments. So, in theory, your blueprint could include Azure resources as well as, say, vCenter resources. CloudShell's orchestration code delegates the deployment to each resource as well as handling network and other services. In the case of Azure, CloudShell deploys via the Azure API using the Azure Resource Manager interface.

Step 4 - Play in Your Azure Sandbox
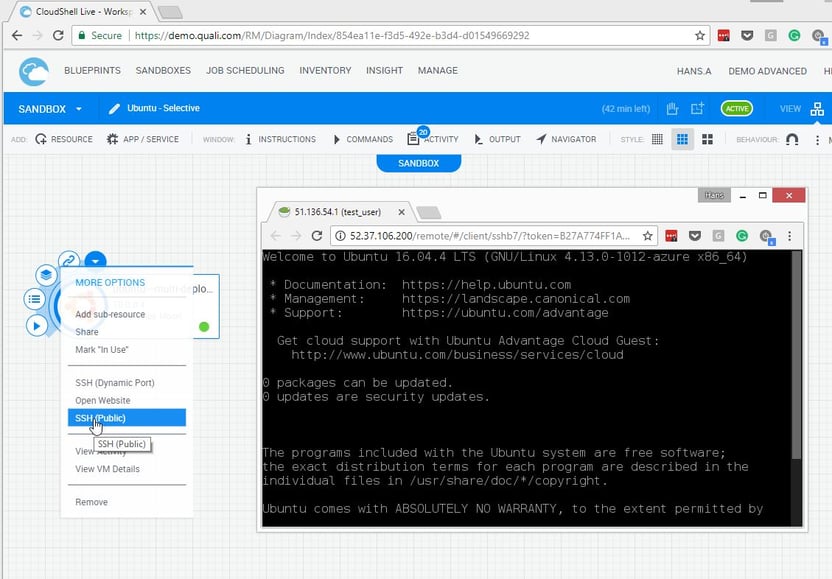
In CloudShell, deployed blueprints are called sandboxes. Once deployed, CloudShell allows you to directly RDP or SSH into Azure resources in your sandbox without having to jump into the Azure portal. You can even connect directly to resources that don't have public IPs without having to set up a VPN.
You can add more Azure resources to a live sandbox just by dragging them into the sandbox environment and running their "deploy" orchestration command.
Step 5 - Get a Better Handle on Your Azure Bill
When you select a blueprint to be deployed, you are (by default) required to specify a duration. At the end of a sandbox's specified duration, CloudShell's teardown orchestration will run, which - like the setup - will de-provision all your Azure resources. This is a great way to ensure your dev and test teams don't unintentionally consume too many Azure resources.
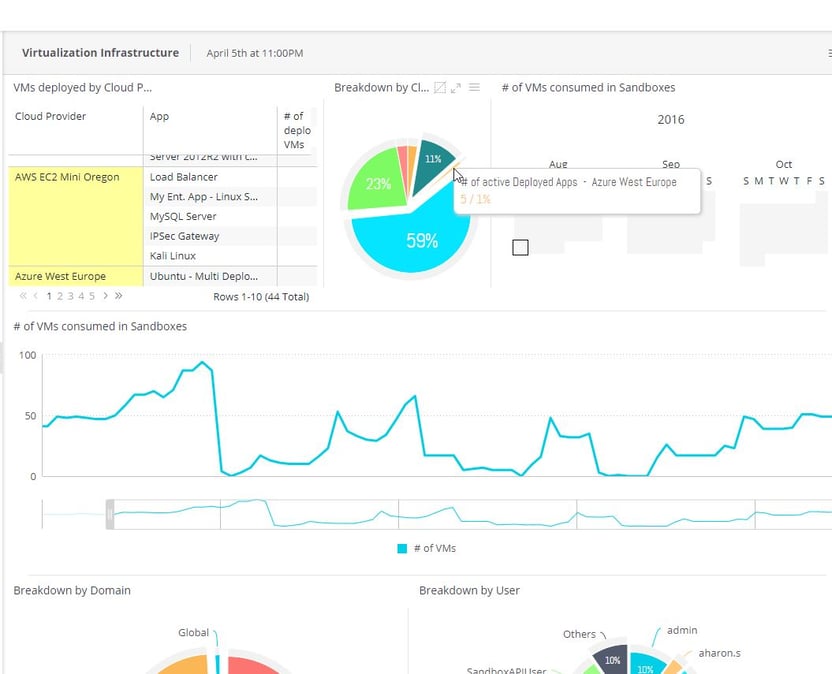
Furthermore, when CloudShell deploys resources in Azure it adds the following custom tags to each resource: Blueprint, CreatedBy, Domain, Name, Owner, and SandboxId. We also create a custom usage report under your Azure billing with these tags. This allows you to get better visibility into what users and teams are consuming what resources and how much they're consuming. This is especially helpful when Azure resources are consumed for pre-production purposes like development environments, test/QA environments, or even sales/marketing demos. CloudShell's InSight business intelligence tool also gives you direct usage dashboards for your Azure deployments.
Summary
We just touched the surface of how CloudShell makes it easier to deploy applications on Azure. There's a lot more we could dive into on how to customize and extend the out the box support for deploying resources to Azure. If you want to learn more you can request a hands-on technical demo.

