
Jet Brains TeamCity & Quali CloudShell integration case study
This article is intended for developers who wish to perform 3rd party integration with TeamCity.
Following customer requests, Quali has decided to support custom integration between CloudShell (our main product) to JetBrains TeamCity CI.
In this article, we will dive into the design and development process of theCloudShell Sandbox TeamCity plugin, which is now available in JetBrains community.
Getting Started
CloudShell & TeamCity
CloudShell, a cloud sandbox platform by Quali, allows users to create and publish a CloudShell Sandbox, which is a replica of a specific computing infrastructure and application configurations, and use it for development, testing, demos, training, and support.
This plugin enables the consumption of CloudShell Sandboxes directly from TeamCity in order to be able to test complex testing environments.
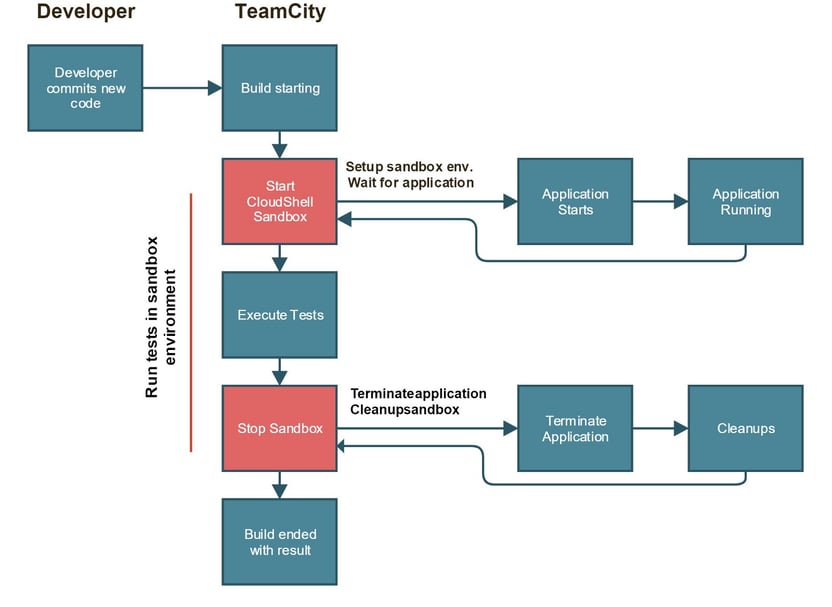
When new code is pushed to the SCM system, TeamCity triggers a build configuration that starts a Sandbox using the CloudShell plugin to enable the execution of tests on that particular Sandbox’s components. Communication between TeamCity and CloudShell is provided by CloudShell’s Sandbox API, a RESTful API designed specifically for DevOps use cases that allows easy interaction with Sandboxes.
Here is an example of a Sandbox containing an application and some AWS services that mimic the staging configuration. This particular Sandbox is designed to be launched by TeamCity and will allow end-users to execute tests on the different components in the Sandbox.
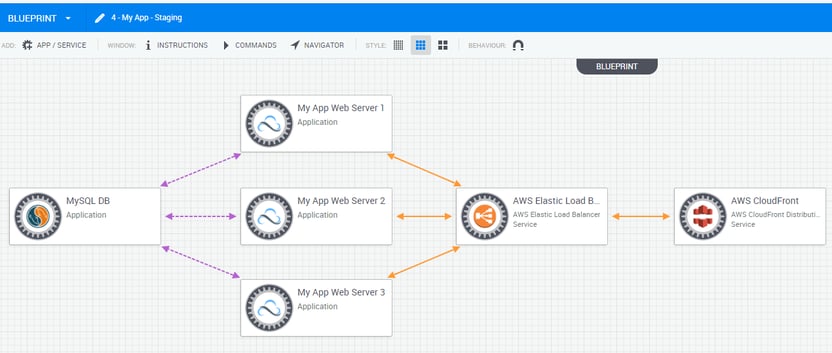
Sandbox containing an application and some AWS services
Plugin Requirements & Design
The plugin comprises three main components: Admin configuration page, Build feature and a runner type.
- Admin Configuration page - Administration page that allows the TeamCity administrator to configure, manage and verify the plugin’s integration and connectivity with CloudShell. The connection info provided in this page will be used in the plugin’s other two components.
- Build Feature (single Sandbox) - Use this option if you want to use a build configuration with a specific Sandbox. The build feature will start a Sandbox prior to the execution of the build steps and will make sure to tear down the Sandbox just before the build completes.
- “Start Sandbox” and “Stop sandbox” runner type (multiple Sandboxes)- When more than one sandbox is needed in a build execution, a build step for starting and stopping each sandbox helps to manage the consumption of the different Sandboxes.
Admin configuration page
Basics
To begin, we added an AdminPage class. This requires implementing the basic configuration of the page (the below basic configuration is from our plugin). Adding an admin page adds a new section in TeamCity’s Administration tab. Note that the new page is under the Integrations section as we override the getGroup() method and use the INTEGRATIONS_GROUP constant.
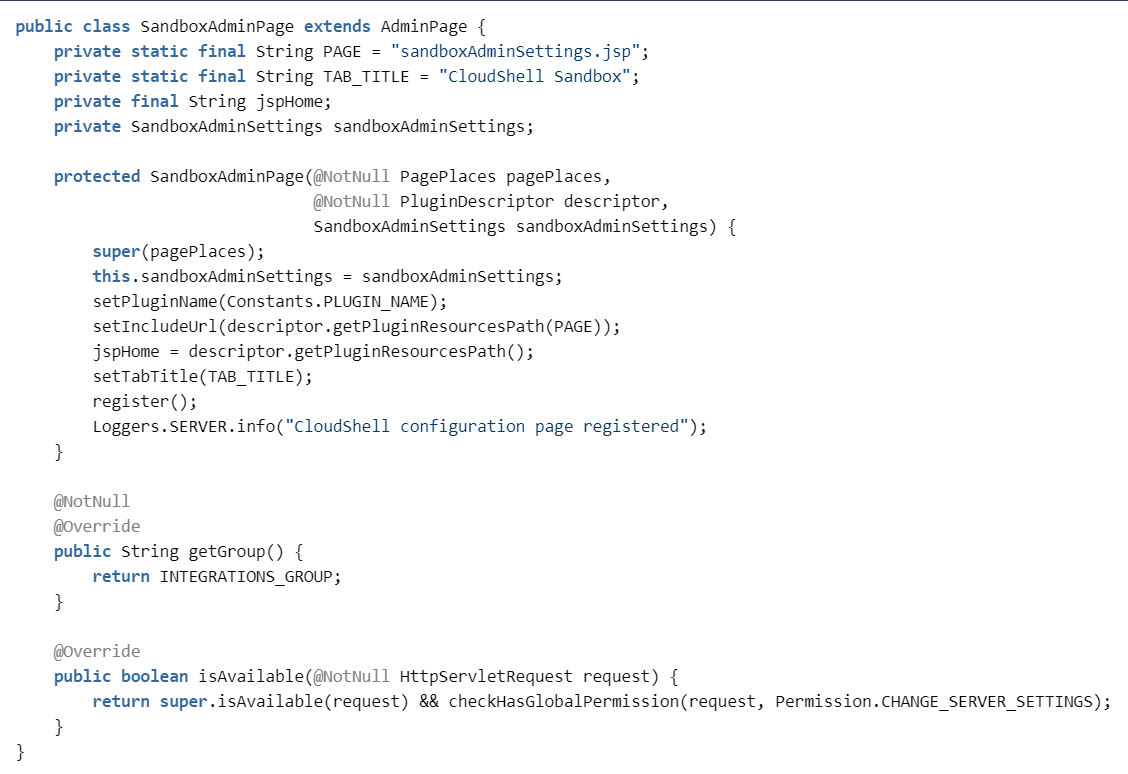
SandboxAdminPage.java in GitHub
Important: Any new resource you add to the project must also be described as a Spring bean so that TeamCity will load it. To include the resource, just add it to the plugin’s XML file. For example:
XML file - missing
Handling plugin data on TeamCity server
The Admin Page we created will be used only as the presentation layer of our plugin. In order to store and use some logic in the TeamCity server, we will create a new controller that will handle the configuration.

The Settings Controller extends BaseFormXmlController to allow easy HTTP POST and GET XML communication. In our case, only a POST request will be used to post data from the UI to the server.
The controller is added in the following way:

The controller gets a POST data form the main Admin Page and uses the Admin Settings class to save the configuration to a server-side config file.
In this plugin, we implemented the admin settings class to store the configuration data in a properties file. It is also possible to save the configuration data using built-in functionalities in TeamCity. When you save the configuration on the server, the user is automatically redirected to the Admin Page, which is reloaded with the data from the properties file.z
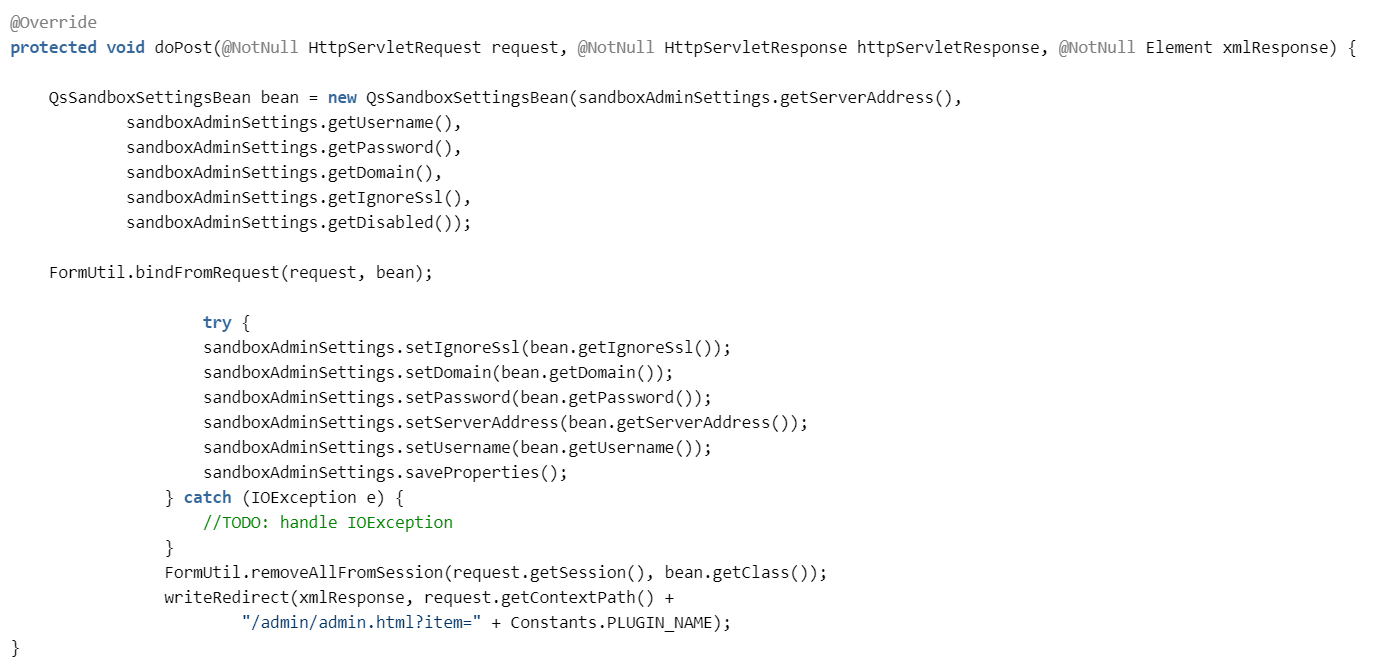
SandboxSettingsController.java in GitHub
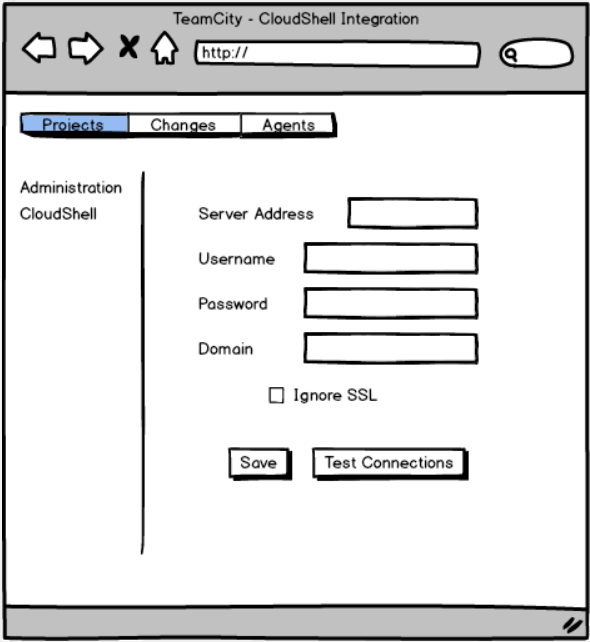
Admin Page user interface
The Admin Page UI is implemented using a JSP form that has two main functionalities, depending on whether the Save or Test Connection button is triggered.
The form includes a parameter that indicates the user-triggered functionality:
- submitSettings — for saving the configuration.
- testConnection — for test connection button.
In the Admin Page JSP, it looks like this:
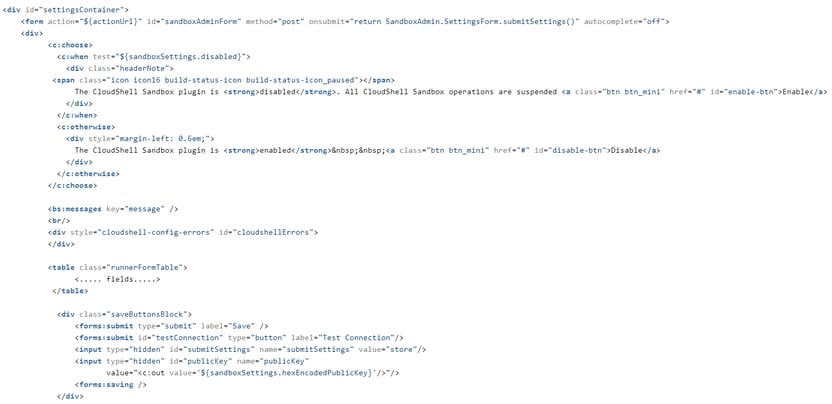
sandboxAdminSettings.jsp in GitHub
Handling passwords securely
A key capability we wanted to achieve was to encrypt the password value during transmission between the client and the TeamCity server. To achieve this, we implemented an extra field in the form bean that stores a public key. When opening the Admin Page, TeamCity generates a public key on the server and sends it the page. Saving the configuration on the Admin Page encrypts the password (using the public key) in a way that allows the server to then decrypt it when it needs to use the same public key. In the properties configuration file, the password is stored encrypted as well.
When one of the fields in the form is a passwordField, the value of the field should be described as an encrypedPassword.
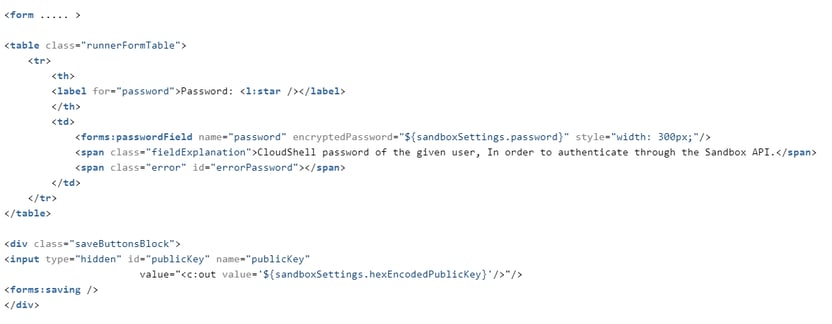
sandboxAdminSettings.jsp in GitHub
To decrypt the value sent from the client and encrypt on the way back, we implemented setter and getter methods called setEncryptedPassword and getEncryptedPassword that will be called when the bean object is accessed.
These methods use RSACipher to handle the values for us. The getHexEncodedPublicKey getter is implemented to ensure the public key is sent to the client in order to handle the encryption.
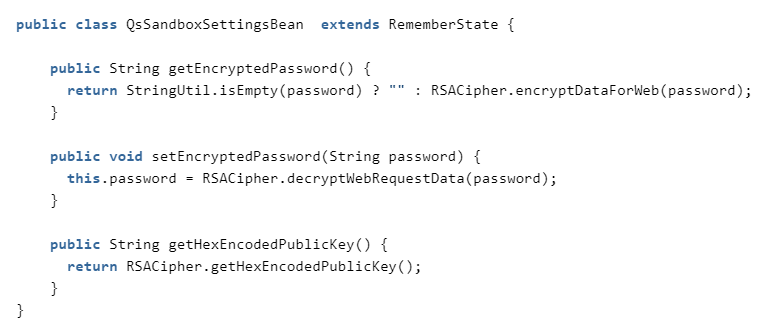
QsSandboxSettingsBean.java in GitHubTest connection
After the administrator fills in all the required fields in the Admin Page form, we want to make sure the integration works and the two systems (TeamCity and CloudShell) can communicate with each other. In our case, the test connection sends a login request to CloudShell. This request verifies that CloudShell is accessible and that the user is authorized to use CloudShell.
TeamCity comes with few built-in options we can utilize to enhance the user experience during the test connection. For example, displaying a progress bar and a nice pop-up message once the test passes or fails.
In the Admin Page JSP file, we included a link to a javascript file that comes with TeamCity called testConnection.js.//JSP file<bs:linkScript> /js/bs/testConnection.js /plugins/sandbox/js/sandboxSettings.js</bs:linkScript><script type="text/javascript"> $j(function() { SandboxAdmin.SettingsForm.setupEventHandlers();});</script>
In order to utilize the built-in testConnection javascript functionality that comes with TeamCity, we implemented sandboxSettings.js. This file extends the base form behavior in TeamCity and registers to TeamCity form events.
Here are the complete Sandbox settings we implemented:
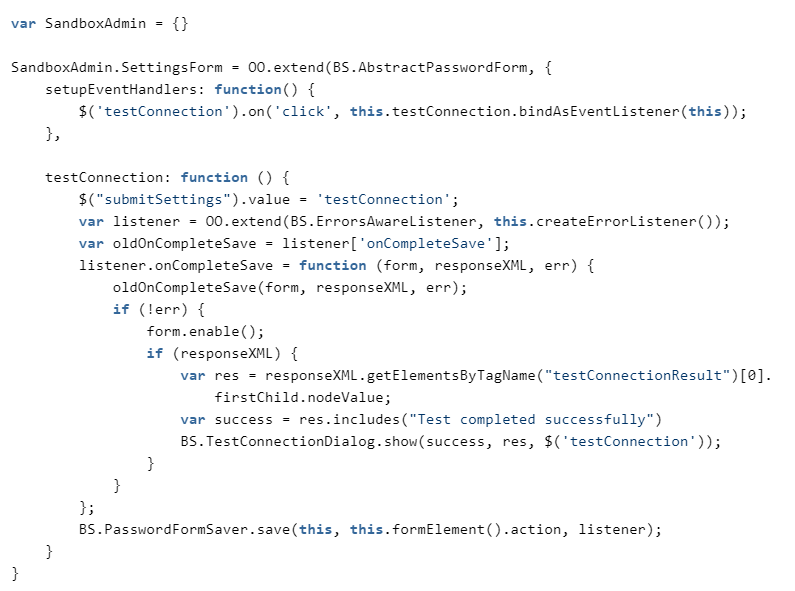
sandboxSettings.js in GitHubThe built-in function BS.TestConnectionDialog.show() allows us to display pass/fail messages to the user.

Build Feature
As previously discussed, the CloudShell build feature was designed to start a Sandbox prior to running the user’s custom build steps and to stop the sandbox just before the build completes. To achieve this, we implemented the AgentLifeCycleAdapter class, which includes the buildStarted and beforeBuildFinish methods. The AgentLifeCycleAdapter is implemented on the agent side and will be packaged as another zip in the final plugin.
The BuildFeature registration on the server is added by implementing the BuildFeature class. As noted in the Admin Page section, make sure to add the new class to the plugin.xml file.
To implement field validations on the server, use the getParametersProcessormethod.
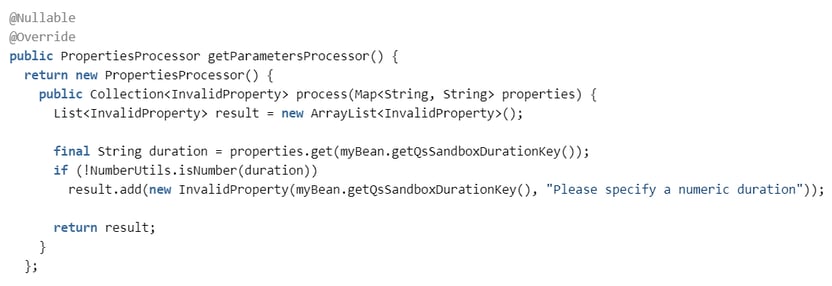
QsSandboxBuildFeature.java in GitHub
Passing the plugin configuration info to agent-side operations
To start our sandbox both in the CloudShell build feature and in the CloudShell Sandbox runner type that will be described below, we need to access the main configuration settings from the agent side. In other words, we need to send CloudShell connectivity details from the server to the agent prior to the build’s execution.
The BuildStartContextProcessor extension point allows us to manipulate the build context and to add additional information that will be accessible in the agent.
In the example below, we added the CloudShell connectivity settings:
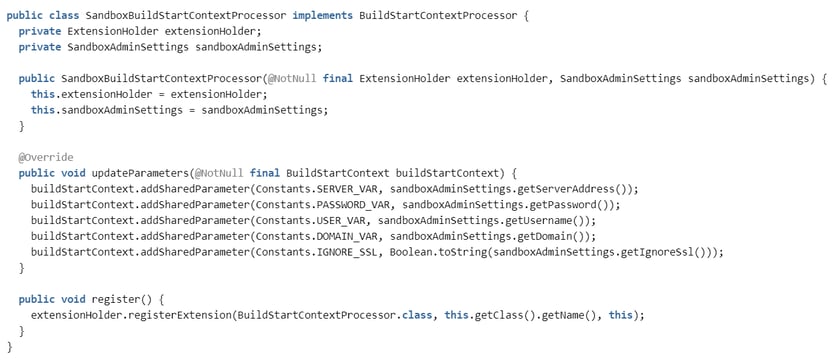
SandboxBuildStartContextProcessor.java in GitHub
To access the CloudShell connectivity details from the agent side, we need to retrieve the shared parameter we set on the server getSharedConfigParametersmethod on the AgentRunningBuild parameter. In this example, the buildStarted method in our build feature just retrieves the shared parameter directly from the AgentRunningBuild variable:
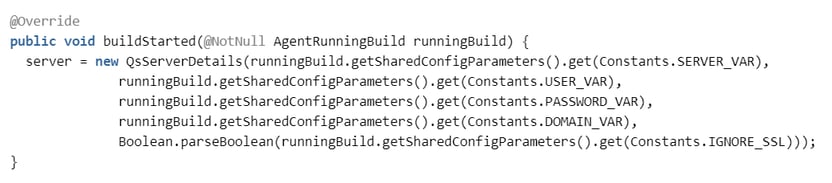
SandboxPropertiesExtension.java in GitHub
“Start Sandbox” and “Stop sandbox” runner type
Adding a build step to TeamCity requires implementing a new RunType and adding it to the plugin.xml file. In our plugin, we wanted to implement a single runner type with two different actions, each with different parameters. For example: the “Start sandbox” action should get a blueprint name while the “Stop sandbox” action should only get the sandbox id to stop.
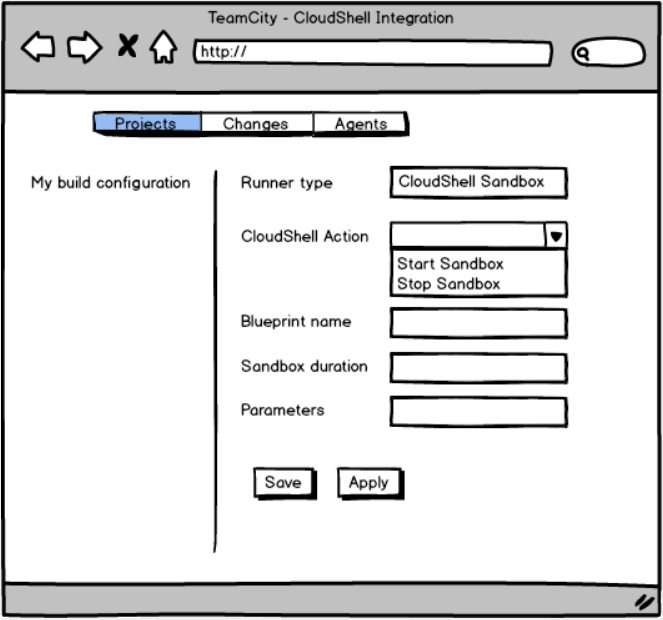
Multiple actions in the same runner type
In our RunType JSP file, we added a drop-down that lists the different actions available in the runner type.
Note that the currValue of each of the options is ${modeSelected}. This way, the form is consistent while the user selection will not change after saving the build step.

sandboxRunnerParams.jsp in GitHub
To control specific fields that should be shown for each of the actions, we added a javascript code that will show and hide the needed fields.
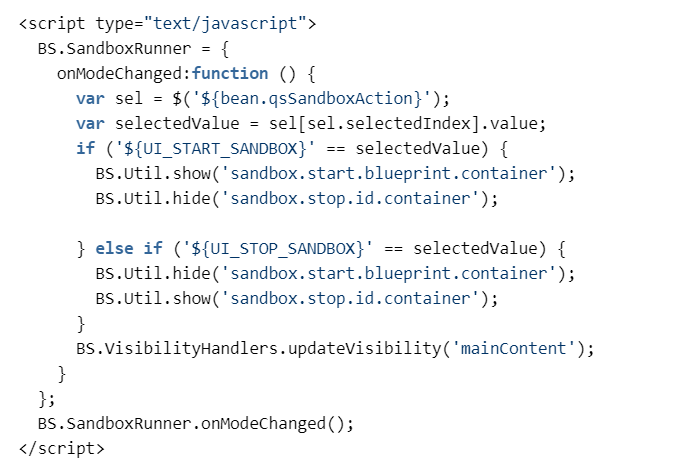
sandboxRunnerParams.jsp in GitHubOn the agent side, we implemented an AgentBuildRunner that will house our custom BuildProcess implementation. The buildProcess implementation will then use the build parameters to locate and execute the relevant action (start sandbox or stop sandbox).

SandboxRunnerAgentBuildRunner.java in GitHub
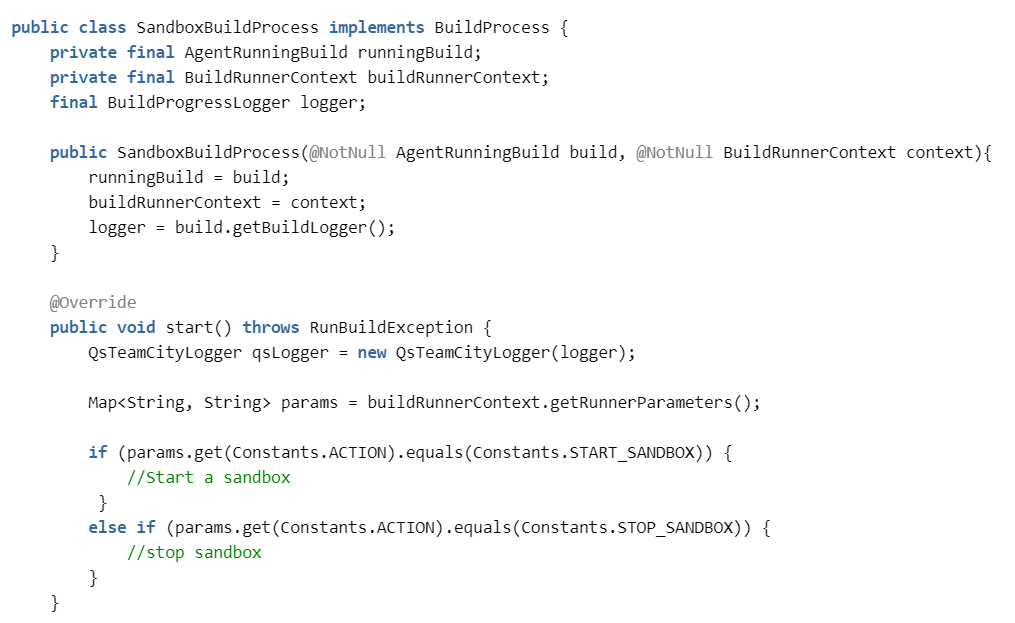
SandboxBuildProcess.java in GitHub
Helpful tips
- Like every other TeamCity plugin out there, we started with an empty project, as described in JetBrains confluence guide.
- We realized that the best approach for debugging and building the plugin was to use the TeamCity-SDK-Maven-plugin that can start afresh TeamCity server-agent setup for you directly from command line. This particular plugin was really useful for reloading our project whenever we performed agent-side code changes or changes to the project resources folder (buildServerResources).
Debugging TeamCity agent
During the development process, we needed to debug the TeamCity agent. To do that, we added the following configuration to the agent.bat file located in the TeamCity agent folder (On Windows: C:\TeamCity\buildAgent\bin). This code allows you to debug the agent over port 8001.:agent_mem_opts_set_doneSET TEAMCITY_AGENT_OPTS_ACTUAL=-Xdebug -Xrunjdwp:transport=dt_socket,address=8001,server=y,suspend=n %TEAMCITY_AGENT_OPTS% -ea %TEAMCITY_AGENT_MEM_OPTS_ACTUAL% -Dlog4j.configuration=file:../conf/teamcity-agent-log4j.xml -Dteamcity_logs=%TEAMCITY_AGENT_LOG_DIR%

